


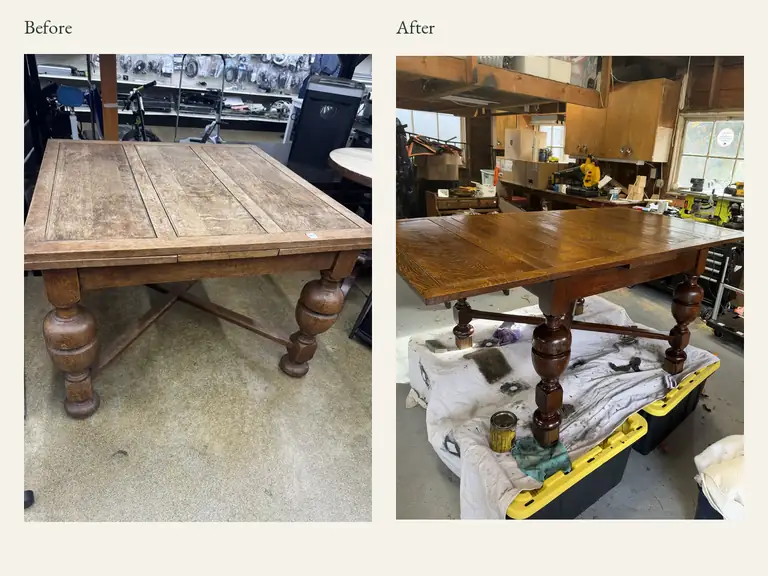
Before and after: the table at Goodwill and restored in the workshop. View the before photograph · View the restored table.
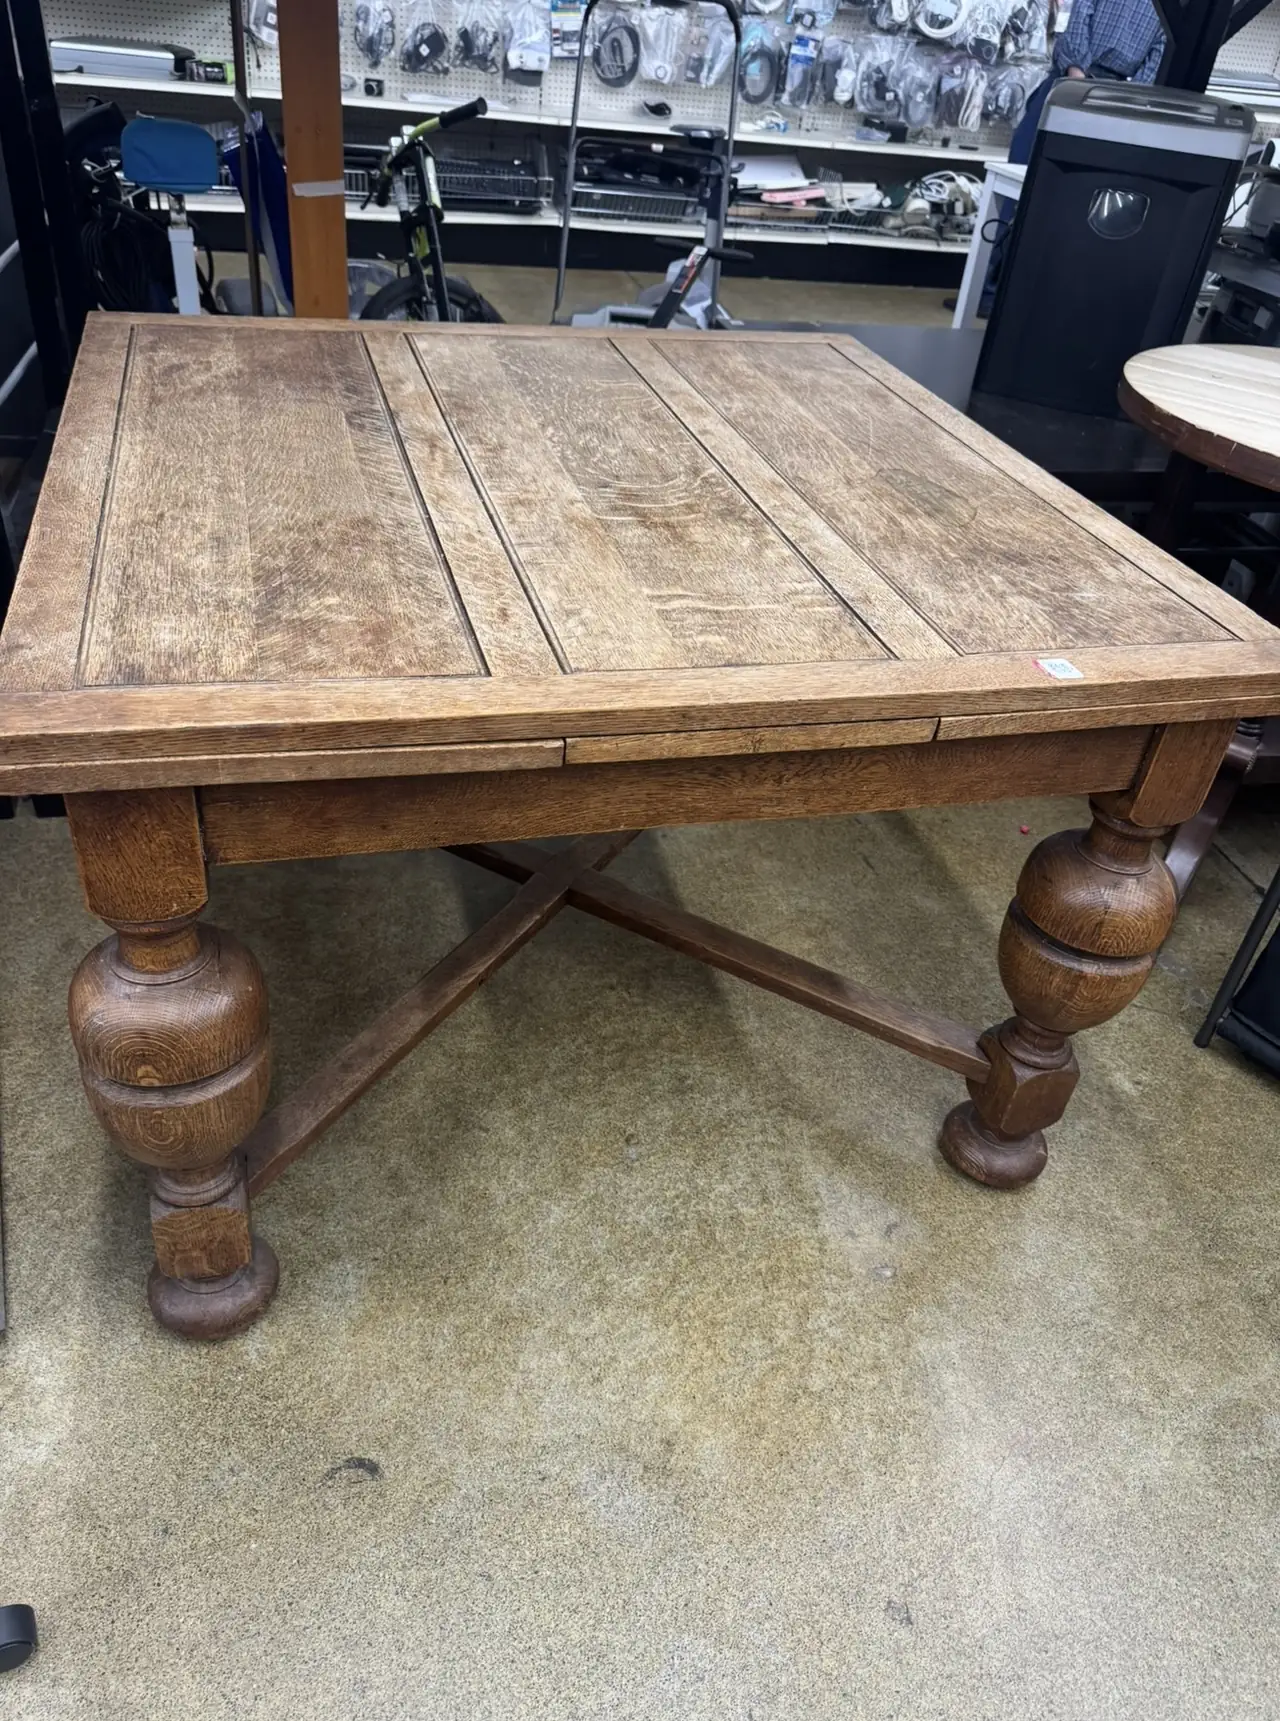
I found this table at a local Goodwill for $14. In the before photograph, the top is pale and worn, but you can still see the grain running through the panels, the substantial turned legs, and the cross-brace underneath.
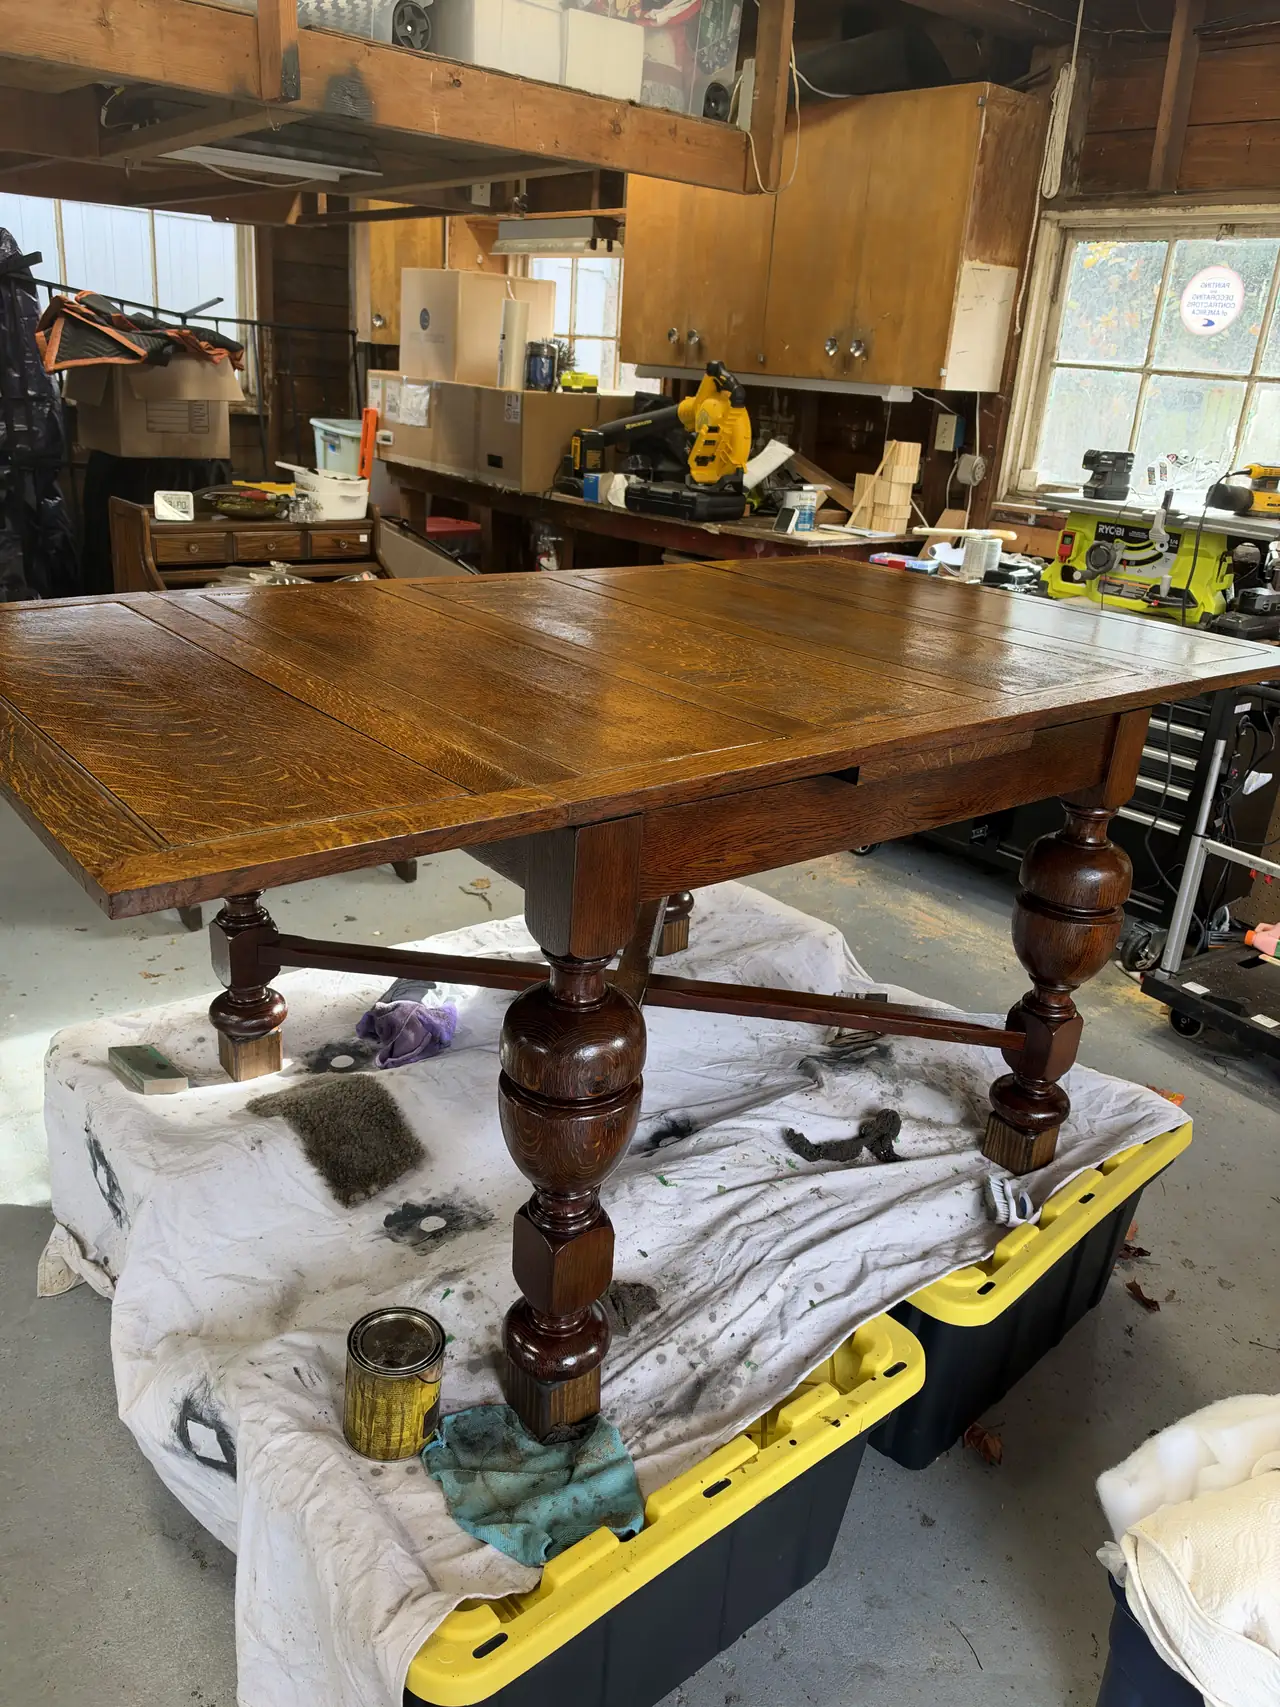
The restoration kept those shapes and changed the height and finish. The photographs make the difference easy to see: the same table, with a warmer surface and a new set of wooden feet.
Three extra inches
I added wooden base feet to raise the table by three inches. The extra height was part of making it ready for the dining room.
The new feet sit beneath the original turned legs. They are a small part of the overall shape, but they are worth noticing in the after photograph. A change like this is easy to miss when the renewed surface catches your eye first.
If you are considering a secondhand table, take measurements of the space and the chairs you plan to use with it. Write down the height you need as well as the length and width. That gives you something concrete to compare with a piece in a shop, rather than trying to work it out from memory.
Bringing the surface back
After adding the feet, I sanded the table and restored it using a wood stain and poly finish from Home Depot.
In the workshop photograph, the top has a richer brown color, and the grain is much easier to follow across the surface. Light catches the finish along the edges of the panels. The curves of the legs and the shapes of the supports remain part of what makes this particular table recognizable.
The before photograph is useful here. It holds the starting point beside the result, so you can look at a particular edge, panel, or leg and see what changed. Keeping that first photograph can become a worthwhile part of a project, even when all you have is a quick picture taken in the shop.

A place in the dining room
The table now has a place in my dining room. Its story includes the $14 Goodwill find, the extra three inches, the sanding, and the new finish.
A project with a clear use waiting for it gives the work a direction. You can picture where the piece will go, what it needs to do, and which changes matter. For this table, the height and surface were both part of getting it ready.
There is room for this kind of making alongside learning a craft from the beginning. Working on an existing piece gives you something to look at closely and a particular set of decisions to make. The result carries the original object forward, with some work of your own added to its story.
Looking at a secondhand find
If a piece catches your attention on your next thrift-store visit, pause long enough to consider the project around it. A few notes can help:
- Name what you like. The shape of a leg, a useful size, or the pattern of the grain gives you a reason to look more closely.
- Name what would need to change. Separate a worn surface from questions about height, size, or how you would use the piece.
- Think beyond the price tag. My table cost $14 to buy. Materials, tools, transport, and the time for the work belong in the plan too.
- Take a before photograph. Keep a record of the whole piece and a few details you want to return to.
You can begin with something already at home, too. Choose one piece, photograph it, and write down the change that would make it more useful to you. If the history of an object draws you in, follow the story behind one thing. When a table is ready for its next chapter, set a table for someone offers a way to put it to use.
For this project, a $14 table, three extra inches, and a restored finish have given the table a new place in my home.
I hope this finds you well,
Scott